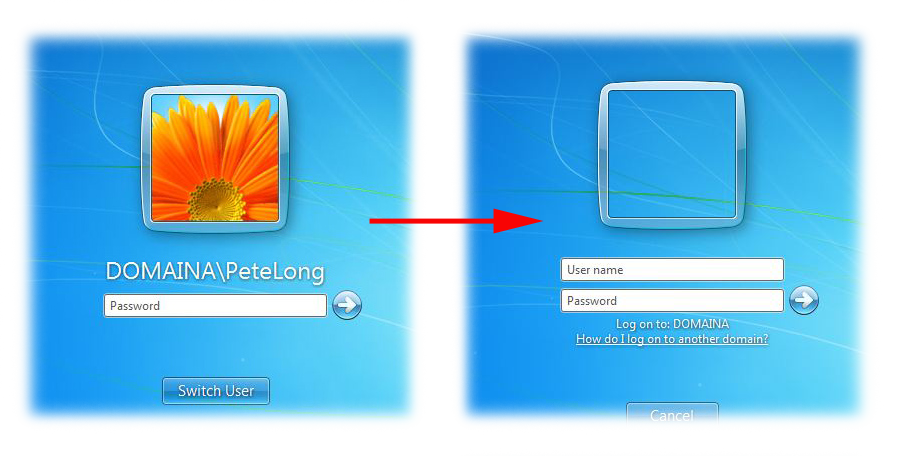
By default Windows will display the last user that successfully logged on, on shared machines or in a secure domain environment you might not want this..
Solution
On a Single (stand alone) machine.
1. Click start and in the run/search box type gpedit.msc{enter}
2. Navigate to > Computer Configuration > Windows settings > Security Settings > Local Policies > Security Options > "Interactive Logon: Do not display last user name".
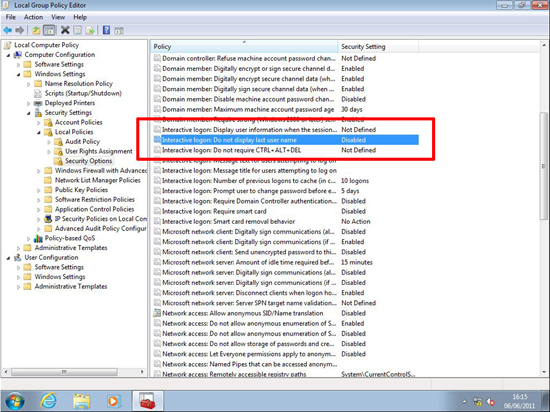
3. Simply enable the policy.

4. Reboot the PC or run gpupdate /force.
In case using a policy editor is not an option for you, you can also
access this configuration setting directly in registry. After all, a
policy editor is only an admin interface for making changes to registry
values.You can set up the Do not display last user name by modifying one setting in your registry. Open the Registry Editor by going to your Start menu, clicking Run, typing regedit and hitting ENTER. Then locate the following registry entry:
HKEY_LOCAL_MACHINE\Software\Microsoft\Windows\CurrentVersion\Policies\System
Change the value of the dontdisplaylastusername keyword to 1. You can see the dontdisplaylastusername setting on the picture below.

The
next time you log into your computer, you will not see the User
Picture Icon anymore, and you will have to fill in both your password
as well as you user name into the Windows Vista logon text fields.
In a Windows Domain Environment
Note: This procedure was carried out Server 2008 R2.
1. On one of your domain controllers > Start > Administrative Tools > Group Policy Management Console > Either select and existing policy or create and link one to the COMPUTERS you want this policy to affect. Then edit the policy.
2. Navigate to > Computer Configuration > Policies > Windows settings > Security Settings > Local Policies > Security Options > "Interactive Logon: Do not display last user name".
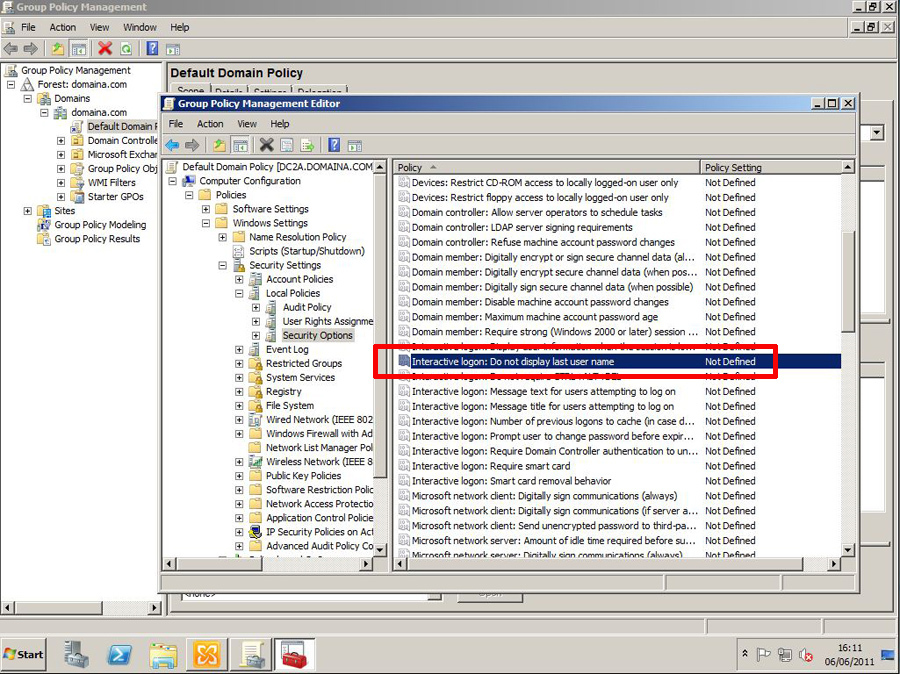
3. Tick to define the policy, and set it to enabled.

4. Reboot the PC or run gpupdate /force.


No hay comentarios:
Publicar un comentario