viernes, 31 de mayo de 2013

Install VMware Player in Ubuntu 13.04 Raring

It's easy to install Vmware Player in Ubuntu – Download a copy, install required packages, and finally run the installer. For details, follow the steps below:

1. Download a copy of Vmware Player from this page. For 32-bit or 64-bit, go ahead to Unity Dash -> System Settings -> System tab.

2. Install required packages by running this command in terminal (Ctrl+Alt+T):

sudo apt-get install build-essential linux-headers-`uname -r`

install-vmware-required-packages

3. If need, change the downloaded package from "VMware-Player-5.0.2-xxx.xxx.txt" to "VMware-Player-5.0.2-xxx.xxx.bundle".

Then give it the executable privilege via command:

cd ~/Downloads/ && chmod +x VMware-Player-*.bundle

install-vmware-required-packages

Finally, run the installer in this terminal window:

sudo ./VMware-Player-*.bundle

install-vmware-player-ubuntu-13-04

Follow the pop-up installer wizard, and finally you'll get "Installation was successful".

VMware-Player-installer-wizard

After that, launch VMware Player from the Unity Dash.

jueves, 30 de mayo de 2013

Instalar el Administrador de Configuraciones de Compiz & algunos plugins extra

Compiz es quien realiza esos efectos de escritorio alucinantes que nos dejan a todos boquiabiertos. Lamentablemente, Ubuntu no viene con ninguna interfaz gráfica para configurar Compiz. Además, tampoco viene con todos los plugins instalados.

Para instalarlos, abrí un terminal y escribí:

sudo apt-get install compizconfig-settings-manager compiz-plugins-extra


miércoles, 29 de mayo de 2013

Instalar herramientas de ayuda para configurar Ubuntu

Ubuntu Tweak

La herramienta más popular para configurar Ubuntu es Ubuntu Tweak (aunque vale aclarar que en los últimos días parecería que su desarrollo terminará, al menos por parte de su creador). Esta maravilla te permite "tunear" tu Ubuntu y dejarlo como te gusta.

Para instalar Ubuntu Tweak, abrí un terminal y escribí:

sudo add-apt-repository ppa:tualatrix/ppa sudo apt-get update sudo apt-get install ubuntu-tweak

Unsettings

UnSettings es una nueva herramienta para personalizar Ubuntu. Hay otros programas como MyUnity, Gnome Tweak Tool y Ubuntu-Tweak que cumplen la misma tarea, pero este incluye algunas características únicas.

sudo add-apt-repository ppa:diesch/testing sudo apt-get update sudo apt-get install unsettings


Instalar repositorios adicionales

Medibuntu

Es un repositorio de paquetes de software que no pueden ser incluidos en la distribución Ubuntu por motivos como problemas legales de copyright, licenciamiento o restricciones de patentes. Incluye programas como: Google-Earth, Opera, Win32codecs, Msfonts.

sudo -E wget --output-document=/etc/apt/sources.list.d/medibuntu.list http://www.medibuntu.org/sources.list.d/$(lsb_release -cs).list && sudo apt-get --quiet update && sudo apt-get --yes --quiet --allow-unauthenticated install medibuntu-keyring && sudo apt-get --quiet update

Para agregar los paquetes de Medibuntu en el Centro de Software de Ubuntu:

sudo apt-get install app-install-data-medibuntu apport-hooks-medibuntu

Installing XAMPP in ubuntu 13.04

After downloading (A complete list of downloads (older versions) is available at SourceForge.) simply type in the following commands:

  1. Go to a Linux shell and login as the system administrator root:

    su

  2. Extract the downloaded archive file to /opt:

    tar xvfz xampp-linux-1.8.1.tar.gz -C /opt

    Warning: Please use only this command to install XAMPP. DON'T use any Microsoft Windows tools to extract the archive, it won't work.

    Warning 2: already installed XAMPP versions get overwritten by this command.

That's all. XAMPP is now installed below the /opt/lampp directory.

* Step 3: Start

To start XAMPP simply call this command:

/opt/lampp/lampp start

You should now see something like this on your screen:

Starting XAMPP 1.8.1...
LAMPP: Starting Apache...
LAMPP: Starting MySQL...
LAMPP started.

Ready. Apache and MySQL are running.

If you get any error messages please take a look at the Linux FAQ.

* Step 4: Test

OK, that was easy but how can you check that everything really works? Just type in the following URL at your favourite web browser:

http://localhost

Now you should see the start page of XAMPP containing some links to check the status of the installed software and some small programming examples.

The Instant Art example: A small PHP/GD program (since 0.9.6pre1 also a flashy PHP/Ming example, see screenshot). Thanks to Anke Arnold for her font »AnkeCalligraph«.

READ ME

* A matter of security (A MUST READ!)

As mentioned before, XAMPP is not meant for production use but only for developers in a development environment. The way XAMPP is configured is to be open as possible and allowing the developer anything he/she wants. For development environments this is great but in a production environment it could be fatal.

Here a list of missing security in XAMPP:

  1. The MySQL administrator (root) has no password.
  2. The MySQL daemon is accessible via network.
  3. ProFTPD uses the password "lampp" for user "nobody".
  4. PhpMyAdmin is accessible via network.
  5. Examples are accessible via network.
  6. MySQL and Apache running under the same user (nobody).

To fix most of the security weaknesses simply call the following command:

/opt/lampp/lampp security
It starts a small security check and makes your XAMPP installation quite secure. For example this protects the XAMPP demo pages by a username ('lampp') and password combination.

Como configurar Google Talk en pidgin

Pidgin, para el que no lo conozca, es un cliente de mensajeria instantanea multiplataforma, multiprotocolo y multicuenta (que de multis)

Tiene soporte para multitud de redes, pero puede haber problemas con google talk, ya que la configuración avanzada no esta bien configurada.

pidginim

Para añadir una cuenta de google talk a pidgin, la añadimos como una mas, nos dirigimos a la pestaña Cuentas, Gestionar cuentas y Añadir, e introducimos nuestros datos.

Protocolo: Google Talk
Nombre de usuario: tu_usuario
Dominio: gmail.com
Recurso: Home
Contraseña: *******

Bien, hasta aquí dirás… que obvio!, pero aquí no acaba todo, porque necesitamos ir a la pestaña avanzadas e introducir los siguientes datos.

Requiere SSL/TLS: No
Forzar SSL antiguo (puerto 5323):
Permitir autentificación en claro sobre canales no cifrados: No
Puerto de conexión: 443.
Conectar con el servidor: talk.google.com
Pasarelas de transferencia de archivos: proxy.jabber.org

A partir de ahora ya podremos usar nuestra cuenta de google talk en el pidgin. Es curioso que estos datos no vengan por defecto. ¿se podría considerar un bug?

Ale, a disfrutar de tú cuenta de google talk.


Installation/FromUSBStick

Outline

The general procedure to install Ubuntu from a USB flash drive is:

  1. Acquire the correct Ubuntu installation files ('the ISO')
  2. Put Ubuntu onto your USB flash drive
  3. Configure your computer to boot from USB flash drive and boot from it
  4. Try Ubuntu or install it to your hard drive.

Introduction

Ubuntu can be installed from a USB flash drive. This may be necessary for netbooks and other computers without CD drives and is handy for others because a USB flash drive is so convenient. Also, you can configure Ubuntu on the USB flash drive to save changes you make, unlike a read-only CD-ROM drive.

Booting from a USB flash drive created with this utility will behave just as if you had booted from the install CD. It will show the language selection and then the install menu, from which you can install Ubuntu onto the computer's hard drive or launch the LiveCD environment.

Note: This article uses the term "USB flash drive" instead of: USB stick, USB drive, thumb drive and USB flash drive.

Prerequisites

To create a USB installation disk, you will need:

  • a 2 GB USB flash drive. Files on this USB disk will be erased, so previously backup your documents. Make sure this USB disk is properly formatted and mounted.
  • an Ubuntu ISO file (see GettingUbuntu to download it)

Creating a bootable Ubuntu USB flash drive

From Ubuntu

  • Install and run usb-creator

You can find usb-creator-gtk in the Unity Dash by typing "Startup Disk Creator" (Ubuntu Desktop) or usb-creator-kde in K-Menu-->Applications-->System-->Startup Disk Creator (Kubuntu). If it is not there, then you can install it using the Synaptic Package Manager or Ubuntu Software Center

  • Insert and mount the USB drive. Inserting the USB drive should auto-mount it.
  • Start usb-creator. It looks like this:

https://wiki.kubuntu.org/Kubuntu/Netbook?action=AttachFile&do=get&target=screenshot-usb-creator.png.

  • in the top pane of usb-creator, pick the .iso file that you downloaded.
  • if the .iso file isn't listed, click "Other" to locate and select the .iso file that you downloaded.
  • Alternately, if you have a CD or DVD-ROM with the Ubuntu version you want to install on the USB flash drive, insert it in your CD-ROM drive and usb-creator can use that.
  • It is not necessary to erase the USB flash drive, however it is advisable that you do so.
  • Select the first bootable partition on the USB device as the disk to use
  • The bootable partition should be formatted as either a FAT16 or FAT32 filesystem. This is the default for most USB flash drives.

Notes

  • NEVER use one of your hard drive partitions in this process unless you really know what you are doing, as data will get erased.

  • There may be a bug during the formatting which will cause two partitions to appear when booting from the USB flash drive. Try selecting each of them and one should work. If not, restart the computer and try booting from the USB flash drive again.
  • If you get a DBus error with usb-creator, this bug report may be helpful: https://bugs.launchpad.net/ubuntu/+source/usb-creator/+bug/458334

From Mac OSX

See How to install Ubuntu on MacBook using USB flash drive

From Windows

Download and use Linux Live Usb Creator.

Once you have usb-creator.exe, run it and follow the same steps as described for Linux (point it at your .iso file or your Ubuntu CD-ROM, point it at your USB flash drive, make sure you have the right device selected, then "Make Startup Disk").

Notes

  • Instead of usb-creator.exe you can use Unetbootin to create a bootable USB flash drive. http://unetbootin.sourceforge.net/

  • You won't be able to select the USB flash drive if it wasn't formatted in a way that Windows can see it. You may have to format it using Windows Explorer in order for it to show up in a creator tool.

Booting the Computer from USB

Remove all unneeded USB items, but keep the network cable attached.

Insert the bootable USB flash drive that you just created in your target computer and restart it. Most newer computers can boot from a USB flash drive. If your computer does not automatically do so, you might need to edit the BIOS settings.

Restart your computer, and watch for a message telling you which key to press to enter the BIOS setup. It will usually be one of F1, F2, DEL, ESC or F10. Press this key while your computer is booting to edit your BIOS settings. (On HP Mini Netbooks, they correct key is usually F9.)

Instead of editing BIOS settings, you can chose a boot device from the boot menu. Press the function key to enter the boot menu when your computer is booting. Typically, the boot screen displays which key you need to press. It maybe one of F12, F10. Note: with some motherboards you have to select 'hard disk/USB-HDD0' to choose the USB flash disk.

You need to edit the Boot Order. Depending on your computer, and how your USB key was formatted, you should see an entry for "removable drive" or "USB media". Move this to the top of the list to make the computer attempt to boot from the USB device before booting from the hard disk.

Alternative methods

PLoP Boot Manager

Some computers can see the USB flash drive and have the option to boot from USB but cannot actually do so. All hope is not lost.

Requirements

Just follow the instructions on the PLop website.

Note: When you use this method, the files on the USB flash drive are changed during boot. To use this method more than once, you must delete all files from the USB flash drive and prepare the USB flash drive again as described below.

A detailed guide to make Plop Boot Manager work from GRUB by installing it on hard drive is available here - http://makegadgetswork.blogspot.com/2012/02/how-to-boot-from-usb-when-bios-does-not.html#more

Windows

This method is recommended if you are creating Linux installation to coexist with your existing Windows installation.

  • Find a usb-creator app and run it

Installing Ubuntu directly on a USB flash drive

In order to install a fully working Ubuntu operating system on your USB flash drive make sure that:

  • Your USB flash drive has more than 2GB of space
  • Your USB flash drive is bootable
  • Your USB flash drive has a high read/write speed and is USB 2.0 enabled

The process is described in detail in an external source.

Create Bootable USB Manually

Here is a way to create a bootable USB flash drive manually. The advantage is you don't have to empty your USB flash drive as long as you have enough space for the files. It also allows multi boot, so you can, for example, have your USB flash drive holding both 32bit and 64bit versions of Ubuntu and other Boot CD tools at the same time.

In order to do so you need :

First you need to install grub onto the USB's MBR. Follow the link to the Grub4DOS Wiki: Simple example:

./bootlace /dev/sdx

For more details, visit: http://sourceforge.net/projects/grub4dos/

Next, you open up the ISO file and extract the files in casper directory. The size (and possibly manifest) are needed if you want to install from the USB flash drive otherwise the install will fail.

total 701060 -rwxr-xr-x 1 adrian adrian     38784 2010-07-27 16:15 filesystem.manifest -rwxr-xr-x 1 adrian adrian        10 2010-07-27 16:15 filesystem.size -rwxrwxrwx 2 adrian adrian 704487424 2010-04-29 05:38 filesystem.squashfs* -rwxrwxrwx 1 adrian adrian   9365872 2010-04-29 05:34 initrd.lz* -rwxrwxrwx 1 adrian adrian   4029792 2010-04-16 06:01 vmlinuz* /media/Fujitsu 60GB USB/bootimg/ubuntu.10.4.x86$

Copy grldr to the root of the drive.

drwx------ 1 adrian adrian   4096 2010-05-05 16:49 bootimg/ -rwxrwxrwx 1 adrian adrian 220049 2009-09-24 17:30 grldr* -rwxrwxrwx 1 adrian adrian   2760 2010-05-04 23:08 menu.lst* /media/Fujitsu 60GB USB$

Now create menu.lst at the root of USB. Example of menu.lst:

default /default #####################  title Ubuntu 10.04 LiveCD find --set-root /bootimg/ubuntu.10.4.x86/initrd.lz kernel /bootimg/ubuntu.10.4.x86/vmlinuz boot=casper live-media-path=/bootimg/ubuntu.10.4.x86/ ignore_uuid initrd /bootimg/ubuntu.10.4.x86/initrd.lz boot

Make sure the path match where the files you copy to.

Now, reboot.

Simpler way using the ISO file

Another way is just using the ISO file as it is on an already bootable USB flash drive that uses Grub (to create one, see above).

  • copy the iso file onto the USB flash drive in the root (top) directory
  • add these lines to the menu.lst file:

title Ubuntu 11.04 i386 find --set-root /ubuntu-11.04-desktop-i386.iso map /ubuntu-11.04-desktop-i386.iso (0xff) map --hook root (0xff) kernel /casper/vmlinuz file=/cdrom/preseed/ubuntu.seed boot=casper iso-scan/filename=/ubuntu-11.04-desktop-i386.iso splash quiet -- initrd /casper/initrd.lz

Note: this might not work with all versions of grub. It was tested with GRUB4DOS 0.4.4 2008-11-11

Known Issues

Ubuntu 11.04 is having issues with USB flash drives from SanDisk that have U3 Launchpad. You can either use another brand or use either u3-tool from Ubuntu Repositories or SanDisk's U3 Launchpad Removal Tool to remove U3.

Some BIOS's (eg., the Eee PC netbook') have trouble recognizing that the USB is bootable. You may have to trick it into booting using the following method: At boot, enter the BIOS by pressing F2. Then, right as you exit the BIOS, hit the Esc key. For some systems, this will bring up the boot menu.

The error "Can not mount /dev/loop1 on /cow" is because usb-creator.exe is not creating a valid casper-rw file holding ext2/ext3 filesystem. Fix: 1) Use Unetbootin or 2) After running usb-creator.exe, recreate casper-rw using cygwin tools or http://www.pendrivelinux.com/casper-rw-creator-make-a-persistent-file-from-windows/. (As of April 2010)

You need Mac OS X to create a USB flash drive that can boot on Macs. Even so, the process is less reliable than using a CD, as the USB flash drive is not always recognized on boot. Reversely, you can't create bootable USB flash drives for other platforms than Macs from withing Mac OS X. This is because Macs use a custom EFI bios with a custom boot-loader and need a special filesystem layout to boot correctly.

viernes, 24 de mayo de 2013

Solucionar el error de VirtualBox “Kernel driver not installed (rc=-1908)”

Si como a mi al intentar abrir una sesión de Virtual Box te ha salido una venta de error como la de abajo este post te puede ayudar.

 
Error con los headers de Virtual Box

Lo primero que te aconsejaría es instalar la versión que esta en los repositorios originales de Ubuntu. A partir de ahí lo único que hay que hacer es instalar los headers para tu Kernel actual de linux y reinstalar el paquete virtualbox-dkms. Lo hacemos de la siguiente forma:

  • Ejecutamos esto para comprobar que versión del Kernel estamos usando
  • aguinar@pc:$   uname -r

  • Instalamos los headers para este Kernel sustituyendo el número 3.5.0-17 por el que nos dió el comando que ejecutamos anteriormente.
  • aguinar@pc:$   sudo apt-get install linux-headers-3.5.0-17-generic
     
  • Reinstalamos dkms
  • aguinar@pc:$   sudo apt-get remove virtualbox-dkms
    aguinar@pc:$   sudo apt-get install virtualbox-dkms

    Ahora reinicias Ubuntu y listo (no es obligatorio). Con esto Virual Box debería volver a funcionar correctamente.


    Upgrade packages or from Ubuntu 12.10 to 13.04

    1. 1

      Launch the update manager

      Press the Superkey (Windows key) to launch the Dash and search for Update Manager

    2. 2

      Check for updates

      Click the Check button to check for new updates. If there are any updates to install, use the Install Updates button to install them, press Check again after that first update is complete — then press the Upgrade button.

    3. 3

      Install the upgrade

      A message will appear informing you of the availability of the new release. Click Upgrade and follow the on-screen instructions.


    jueves, 23 de mayo de 2013

    VirtualBox kernel modules do not match the version of VirtualBox

    The VirtualBox 4.2.12 on Ubuntu 12.04 was running fine till I needed to install guest additon. After its installation:

     Failed to open a session for the VM Win 7 exit code 1;  RTR3Init failed with rc=-1912(rc=1912) 

    This is because you have two separate versions of VirtualBox installed!

    I would recommend that you fully uninstall all versions of VirtualBox:

    sudo apt-get autoremove 'virtualbox*' 

    Then reinstall directly from Oracle. Go to the VB download page, scroll down to "Debian-based Linux distributions", and follow the instructions.

    Then try again.


    INSTALAR PAQUETES .DEB DESDE LA TERMINAL EN UBUNTU

    Para instalar un paquete .deb desde la terminal lo único que hay que hacer es seguir estos pasos:

    1-Abrimos la terminal.
    2-Entramos como usuario con el comando: sudo su
    3-Indicamos a la terminal dónde esta el paquete .deb
    Así por ejemplo si esta en el Escritorio, pondremos en la consola los comandos cd Escritorio.
    3-Metemos el siguiente comando:
    dpkg -i nombredelpaquete.deb


    jueves, 16 de mayo de 2013

    Get old Gnome look back in Ubuntu 12.10

    Ubuntu is one of the very popular distribution among Linux family. In the past years, so many new distribution were introduced in the market but only one operating system takes lead over Ubuntu that is Linux mint. But still Ubuntu is the base because Linux mint is Ubuntu based operating system whose  goal is to provide the all usable browser plugins, media codecs, java and other components. A new look of Ubuntu is very awesome  but sometimes it becomes problematic for few users who doesn't have the sufficient video memory to deal with heavy graphical environment. So today's article is based on the solution of this problem, or you can get back old Gnome look in Ubuntu. Most of the people prefer Gnome Desktop because it utilize less memory as well as provides better performance than KDE. But then also both are the different because they both have some unique features.

    Before telling more about this i want to show you the new look of Ubuntu which is awesome but it utilizes more graphics memory

    ubuntu new look Get old Gnome look back in Ubuntu 12.10

    Now get ready to revert your old look back in Ubuntu. Just follow the below steps and get the solution of  your problem 

    STEP: 1
    —————————————————————————————————————————————
    First of all open the terminal and update the apt repository by executing the following command. You must have internet connection for solving this issue.

    ubuntu apt update Get old Gnome look back in Ubuntu 12.10

    STEP: 2

    —————————————————————————————————————————————
    After that you have to install a package that is "Gnome-session-fallback". For installing the package just follow the below command.

    ubuntu session Get old Gnome look back in Ubuntu 12.10

    STEP: 3
    —————————————————————————————————————————————
    Wait until the installation of the package, after that just close the terminal and log-out the system from right top menu.

    STEP: 4
    —————————————————————————————————————————————
    Now you will find the log in screen of Ubuntu which will ask you for entering your password, before this you have to choose the desktop environment for getting the old gnome look so, just follow the below images and then enter the password.

    ubuntu integrated Get old Gnome look back in Ubuntu 12.10

    STEP: 5
    —————————————————————————————————————————————
    After log in with your username and password you will find the Gnome old look in your Ubuntu 12.10 and downgraded version.

    Install KDE 4.10 in Ubuntu 12.10 Quantal/Ubuntu 12.04 Precise/Linux Mint 14/13 (New Release)

    If you want to install KDE instead Genome in your Ubuntu 12.10, follow these steps:

    To Install latest KDE in Ubuntu/Linux Mint open Terminal (Press Ctrl+Alt+T) and copy the following commands in the Terminal:
    • sudo add-apt-repository ppa:kubuntu-ppa/backports
    • sudo apt-get update
    • sudo apt-get install kubuntu-desktop
    If you already have KDE then enter following commands to upgrade:
    • sudo add-apt-repository ppa:kubuntu-ppa/backports
    • sudo apt-get update
    • sudo apt-get dist-upgrade


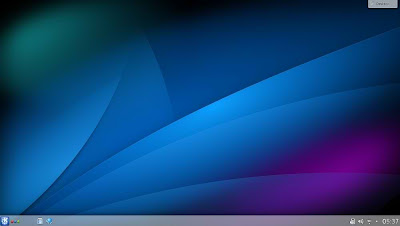
    kde 4.10

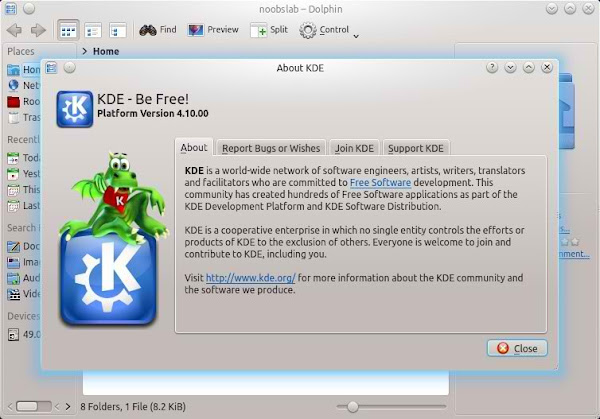
    kde 4.10

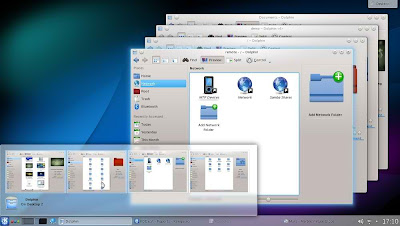
    Ubuntu kde

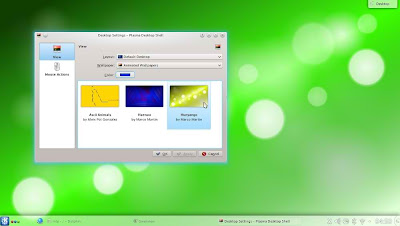
    linux kde

    ubuntu kde 4.10

    kde

    miércoles, 8 de mayo de 2013

    Grabar varias imagenes ISO simultaneamiente con Nero

    Grabar una imagen ISO con Nero es muy sencillo. Tan solo sigue estos pasos:
    • Si aun no tienes instalado Nero 9 en tu PC descarga Nero y ejecuta el archivo de instalación.
    • Abre Nero Burning Rom Para ello desplazate a Menú Inicio -> Todos los programas -> Nero -> Nero 9 -> Nero Burning Rom.
    • En la ventana principal haz clic en Archivo y selecciona Abrir

    Nero Burning Rom

    • Se abre una ventana en la que debes buscar la imagen que vas a grabar, una vez que hayas navegado hasta la carpeta donde tienes la imagen descargada, la selecciónas y dale clic al botón Abrir
    • Aparecerá la ventana Grabar compilación
    • Selecciona la opcion "Usar varias grabadoras" al final del menu de la derecha (ver imagen siguiente)

    Nero Burning Rom Grabar

    • En este caso se trata de la imagen de un CD, aquí puedes ajustar la velocidad de grabación (recomendable la velocidad más baja para segun que tipo de CD)
    • Finalmente haz clic en el botón Grabar


    Cambiar tamaño de fuente al reducir la ventana (HTML / CSS)

    Cambiar el tamaño del texto a medida que se reduce el tamaño de la ventana (HTML5 / CSS3)   . container { border : solid 1px blue ; ...